构建静态网站
网站结构

准备好文件
1 Dockerfile文件
FROM ubuntu:16.04
MAINTAINER James Turnbull "james@example.com"
ENV REFRESHED_AT 2014-06-01

RUN apt-get -qq update && apt-get -qq install nginx

RUN mkdir -p /var/www/html/website
ADD nginx/global.conf /etc/nginx/conf.d/
ADD nginx/nginx.conf /etc/nginx/

EXPOSE 80
2 创新nginx目录,新增2个配置文件
global.conf
server {
        listen          0.0.0.0:80;
        server_name     _;

        root            /var/www/html/website;
        index           index.html index.htm;

        access_log      /var/log/nginx/default_access.log;
        error_log       /var/log/nginx/default_error.log;
}
nginx.conf
user www-data;
worker_processes 4;
pid /run/nginx.pid;
daemon off;

events {  }

http {
  sendfile on;
  tcp_nopush on;
  tcp_nodelay on;
  keepalive_timeout 65;
  types_hash_max_size 2048;
  include /etc/nginx/mime.types;
  default_type application/octet-stream;
  access_log /var/log/nginx/access.log;
  error_log /var/log/nginx/error.log;
  gzip on;
  gzip_disable "msie6";
  include /etc/nginx/conf.d/*.conf;
}
开始构建
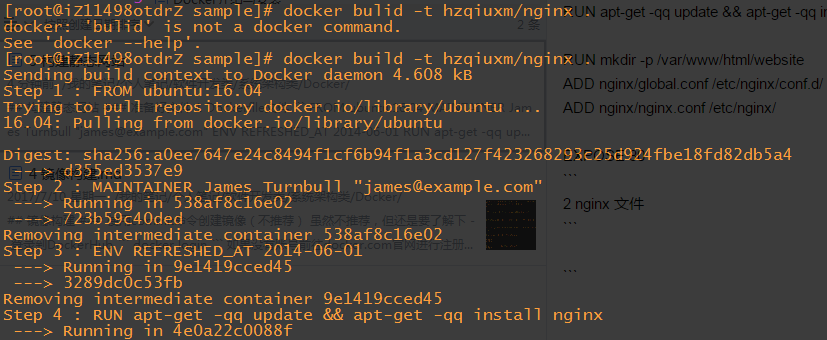
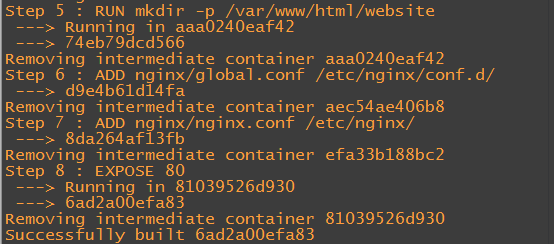
1 执行
docker build -t hzqiuxm/nginx


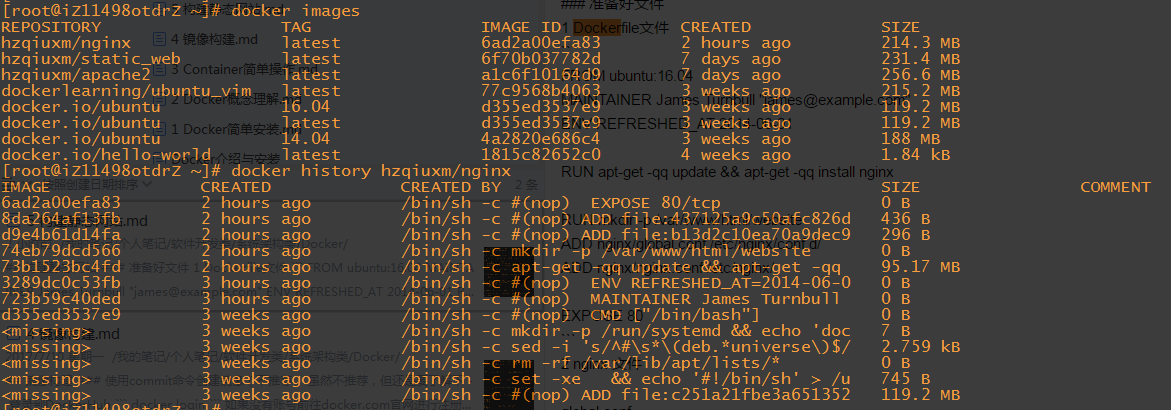
查看下构建历史
docker history hzqiuxm/nginx

可以对照镜像看到,history的命令从新构建的hzqiuxm/nginx镜像的最后一层开始,追溯到最开的ubuntu镜像
2 构建一个nginx容器
docker run -d -p 80 --name website -v $PWD/website:/var/www/html/website hzqiuxm/nginx nginx

可以看到启动的容器的80端口被映射到了宿主机的32768端口,我们可以输入IP:端口访问该网站

如果要修改的话,只要修改宿主机website下的index.html文件即可,修改后刷新页面即可看到效果


知识点扩展
- 容器之间的连接有3种方法,一般只推荐Docker Networking (其他二种分别是内部网络和Docker链接)
- Docker Network可以在不同宿主机容器间通讯(根据创建网络的方式不同来实现)
 菡萏如佳人
菡萏如佳人